Posted on 17th Oct 2025
| 5 Minute Read
In this blog, we'll be teaching you the basics on how to make a modpack for yourself. For this blog, we'll be using CurseForge. Firstly, you'll want to download it from their official website. We recommend the standalone version of CurseForge. Download the CurseForge app.
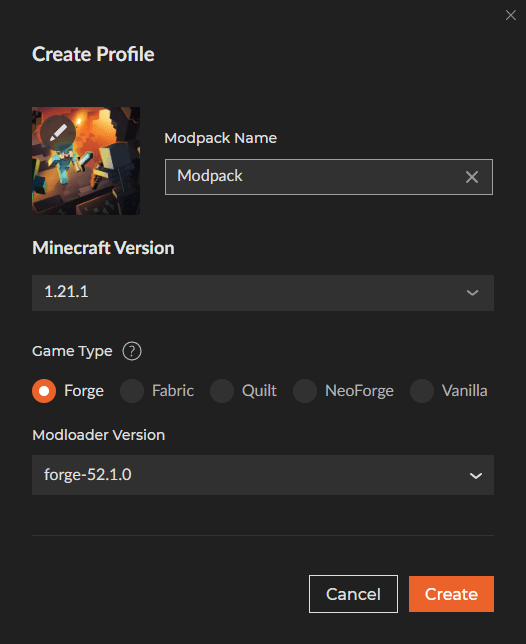
Once you finish downloading it and setting the launcher up, you can open it up and click the 'Create' button with a plus icon.

Then, you'll need to decide what version and modloader you wish to use. The two big modloaders are Forge and Fabric, both of which have their own set of advantages. In this example, we'll be using Minecraft version 1.21.1 with Forge.
Once you click 'Create' allow it the time it needs to install the necessary files. Once it is done, you should be able to add content using the 'Add Content' button with a plus next to it. Click that to start adding some mods to your modpack!
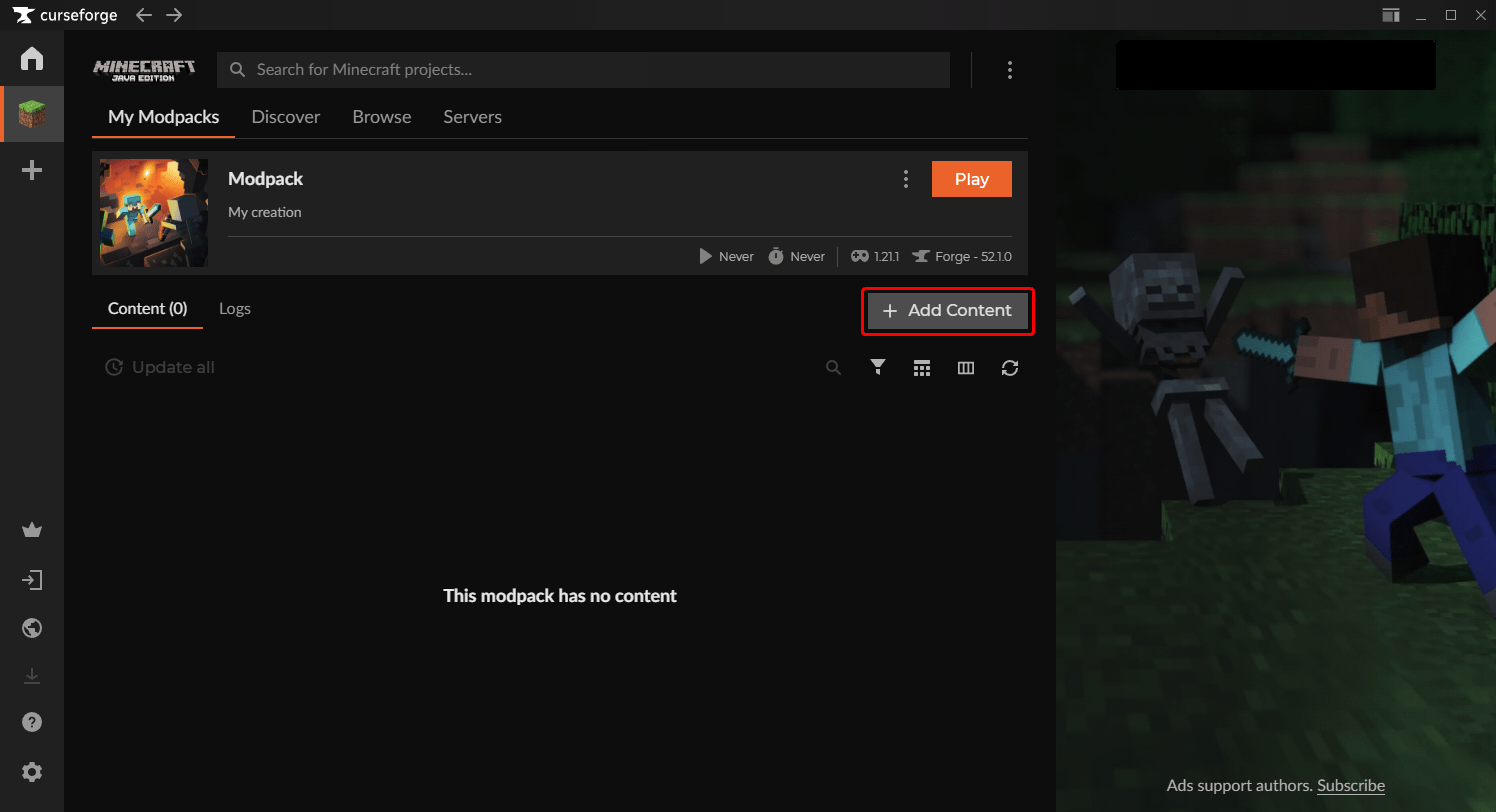
We'll only be adding one mod in this example, Just Enough Items, as you'll have to decide which ones you wish to use. Don't worry about dependencies or version differences, CurseForge will automatically download dependencies and filter out mods for differing versions or modloaders.
Once you're done adding your mods, click 'Play' and go through the launcher! If you have issues starting up your modpack, you can try to take a look at the crash reports in your files to see if you can identify any issues. Most of the time, you'll want to remove mods you suspect are causing the most issues. While CurseForge filters out known incompatible mods with your pack, there are a lot of mods that aren't known to be incompatible. These issues can only be resolved by you, but once you sort through all of your mods, you should be able to boot up on the main screen.
Once you're on the main screen, you should see a new 'Mods' button on the title. Click that, and from there you can verify your mods are installed.
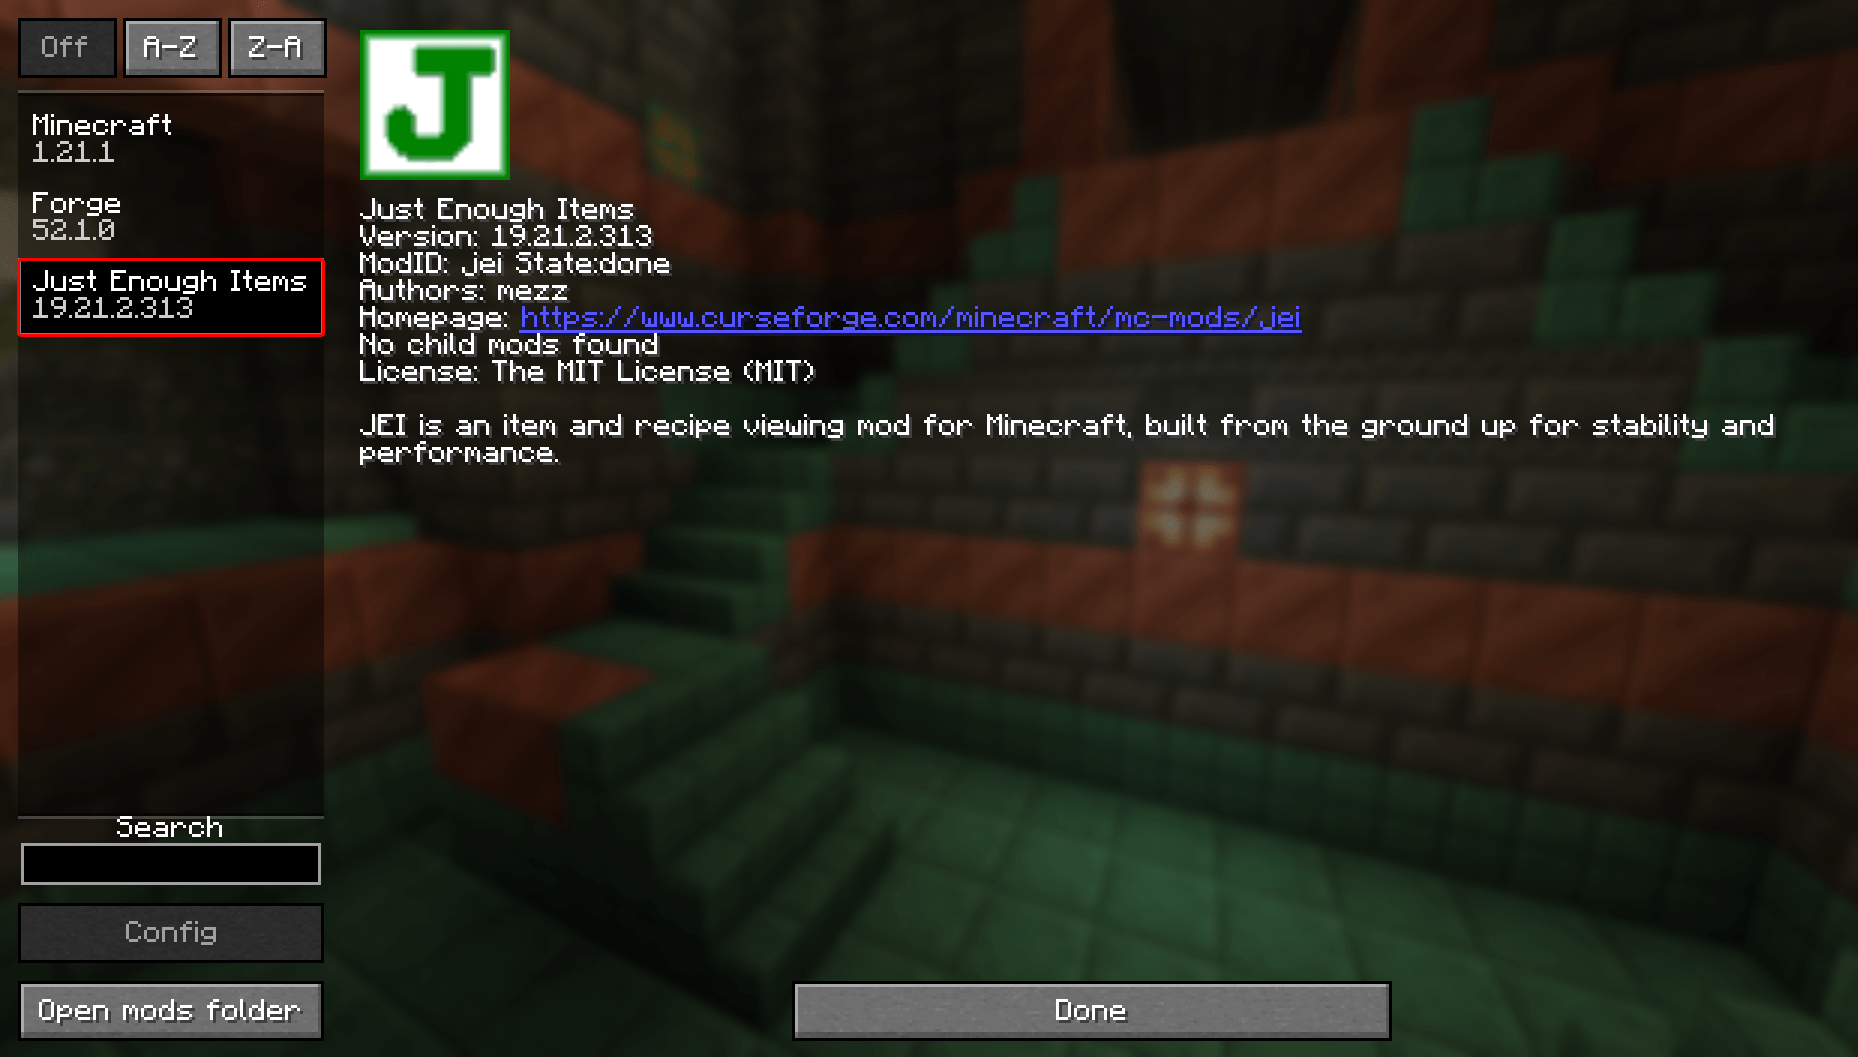
From there, you'll have to decipher which mods are and aren't client sided. Client sided mods are ones that are only used on the client side, and will do nothing or potentially cause issues when installed onto your server. There is a useful tool called ServerPackCreator that can help alleviate this problem. Once you've figured out which mods are client sided, you can upload the rest onto your server.
That should conclude our basic guide on how to set up a modpack. We offer an easy-to-use service that should be a great place to experiment with your modpack. If any issues you can't resolve arise, you can submit a ticket to our support team. They would be more than happy to help you with your modpack! Get a server today with our excellent Minecraft Server Hosting.
Our service is straightforward, and it only takes a few clicks once your server is purchased to get your server up and running! If you're not happy with your custom-made modpack and wish to use a pre-made one, we offer hundreds of different modpacks with our one-click installation on our panel!